
How to make a backup of family photos and videos
At the end of the 20th century, photos existed on film and were stored in printed form in albums. But between 1994 and 1996, everything changed. Technological advances affected not only computers but also cameras and camcorders—digital cameras appeared on the market, and photos are now stored as files, usually in JPEG format.

Cameras have long been part of our smartphones, and they're now always at hand. Thousands of photographs are taken around the world every second.
But not all photos are meaningful to us. Family photos and videos are especially precious. They reflect our entire lives: gatherings with friends, vacations at the seaside, the birth and raising of a child, and a favorite job. This article will discuss how to carefully store photo and video files and reliably protect them from loss.
What is the best way to store home photos and videos?
Many of us store photos and videos only on our home PCs, in temporary folders like "1", "!!", "Qwerty", "QWE", "ASD", "New Folder", "New Folder (2)", or even on our smartphones, without a thought for their safety. If a drive (PC, smartphone, or laptop) crashes, files are corrupted by a virus, or are blocked by a particularly dangerous ransomware program, there's a risk of losing them.
Ideally, the folder structure for storing photo/video collections should be meaningful, for example:
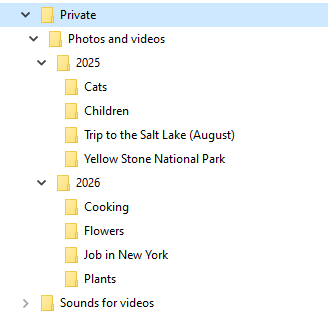
This is important so you can easily find the photos you need later using the search function and share them with family or friends.
However, storing photos properly isn't enough – you also need to ensure their future safety.
It's important to understand that your photos and videos are always at risk of being destroyed. And there are many such threats:
- File corruption by a virus
- PC file system failure
- Hardware failure (failure of the hard drive where the files are stored)
- Fire
- Theft
- Accidental deletion of files by PC users
It is very important to periodically, for example once every 2 weeks, make a backup of your photos to any other storage:
- Another HDD or SSD on the computer
- An external drive or flash drive
- Cloud
- Another PC or laptop on the local network
Flash drives usually have a small capacity of 64, 128, 256 GB, and this may clearly not be enough to store a backup copy of all your multimedia files.
Copying files to another HDD or SSD on the same computer is possible, but the reliability of this approach is questionable, since a strong power surge or a PC power supply failure could, theoretically, burn out both drives (containing the originals and backups of the data) at once.
For storing family photo archives, I think an excellent way is to keep photos and videos on your PC and periodically copy them to an external drive connected to your computer's USB port. A hard drive with a capacity of 500 GB - 1 TB is quite suitable. You'll need to purchase it. The external drive can be stored on a shelf in a closet, connecting it to your PC to do backups.
Automatically backup photos and videos with Exiland Backup
To create backups, you can use any dedicated backup program, such as Exiland Backup. Let it create backups of your photo to an another drive to reliably protect your graphic files from all kinds of troubles. This utility works on the "set it up once and forget it" principle.
Download the 30-day demo version, install, and launch it.
Create at least one backup job.
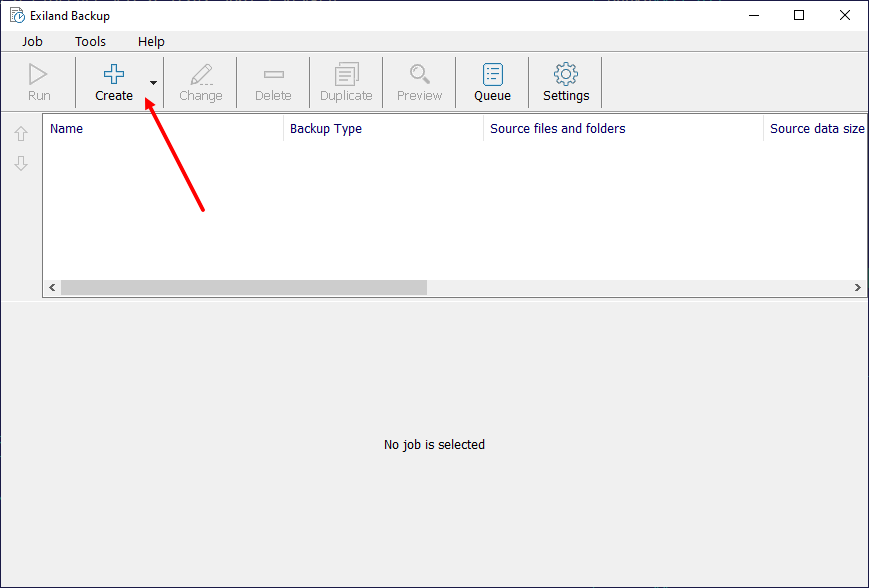
After starting the program, the main window will appear. To create a new backup job, click the "Create" button located on the top panel.
A step-by-step wizard will appear on the screen.
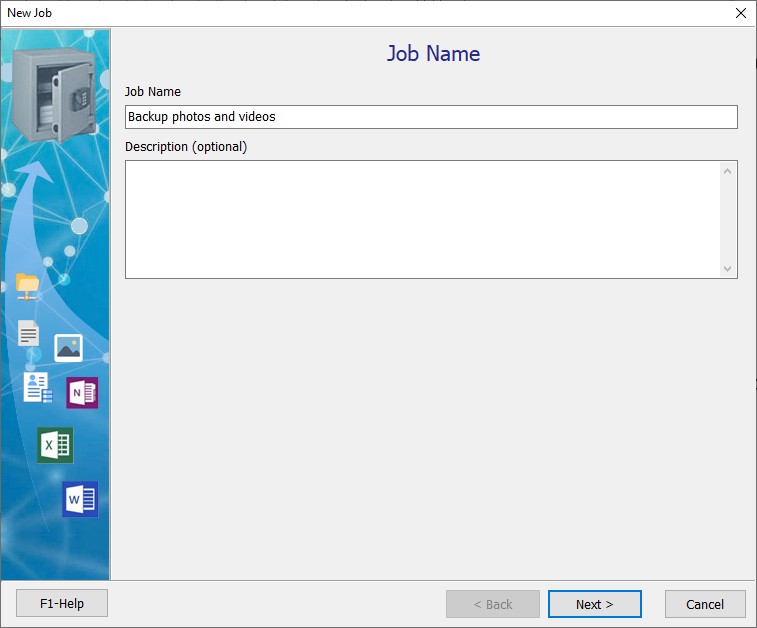
Step 1: Job Name
Name your backup job anything you like, for example, "Backup photos and videos", and click "Next".
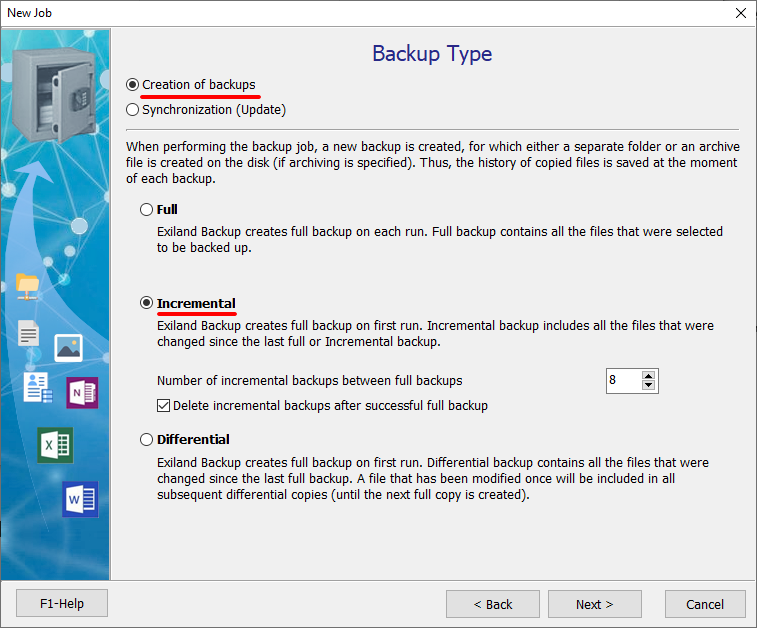
Step 2: Backup Type
If the photos and videos volume is large, select the Incremental backup type as the most size-effective.
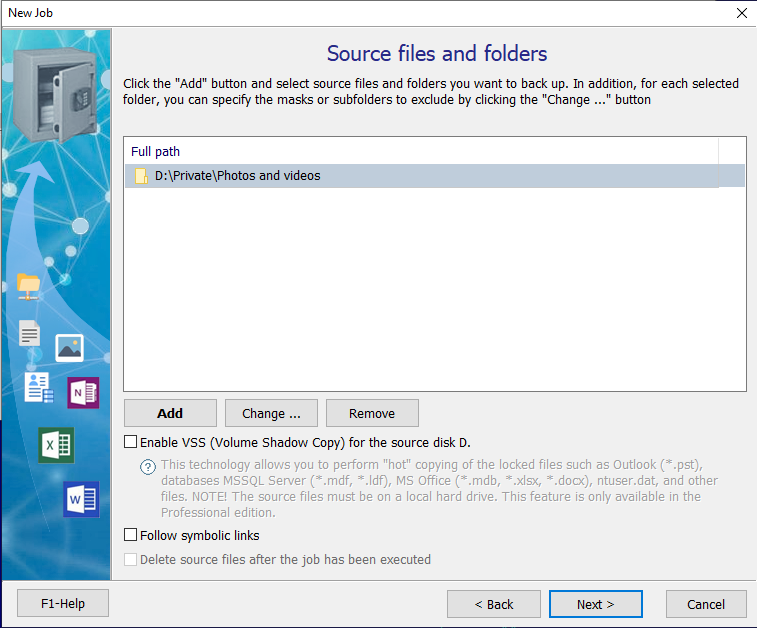
Step 3: Source files and folders
To specify your source files to be backed up, click "Add – Local/Network files and folders". Specify the root of your flash drive like "E:\" and switch to "Path with volume name" to avoid depending on a drive letter each time you connect the flash drive to USB port. Thus, the path to the flash drive will be specified by the volume name. This is very important!
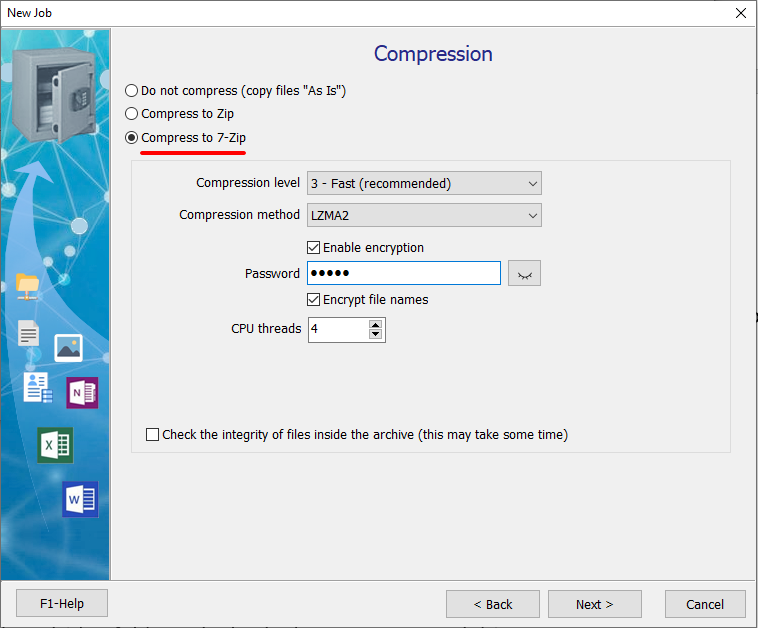
Step 4: Compression
At this step, select "Compress to Zip" and specify archiving settings. Then click "Next".
Step 5: Where to save backups
You can specify several storage locations here. But, for example, we will specify just one – a folder on the external drive such as "<Samsung:>\Backups". To do this, click "Add - Local / Network Folder", then click the "..." button on the right and select the folder.
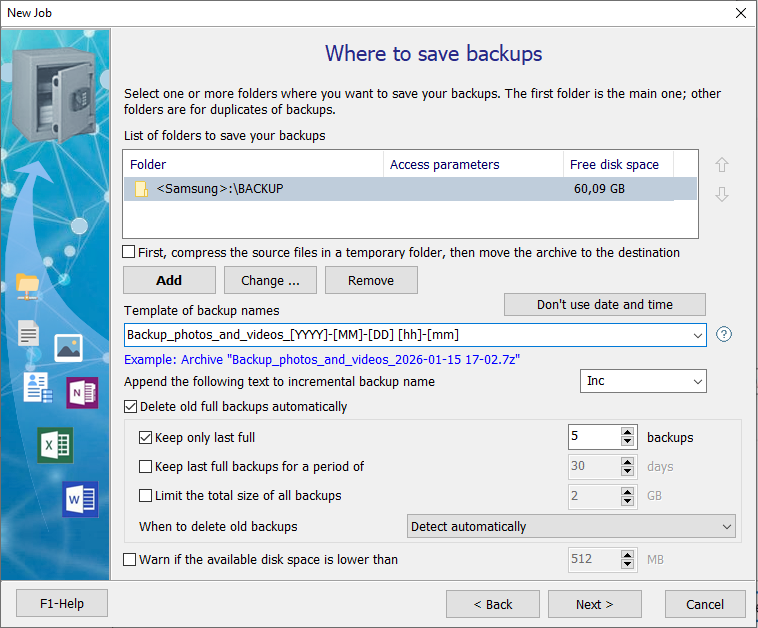
You don't have to specify a schedule for automatically running the backup job. You can run the job manually, by clicking on the "Run" button.
Click "Finish" to complete the backup job creation.
Starting a backup job
Click the "Run" button located on the top panel and watch the backup process.
While a job is executing, a progress indicator panel is displayed in the Notification area. You can configure the display method of the information panel in the general program settings. You can close the information panel or minimize the entire program to the Notification area (System Tray).
The result is a created 7-Zip archive, which is displayed on the "Created backups" tab.