
Synchronization of folders and files over a local network, SFTP or to an external HDD
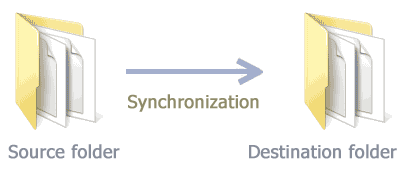
Automatic folder synchronization allows you to organize and maintain two identical directories: source and destination. Files can be copied from the source folder to the destination one over a local network or over the Internet using the secure SFTP (SSH) protocol. When you add or change files in the source folder, all changes will be reflected in the destination.
For example, at home or at office, you have a main working directory on your local or nearby computer. You need to automatically copy files from it to another location: a USB flash drive, external hard drive, over a local network or to a remote server using SFTP protocol.
In this article, you will learn how to create and configure a new backup job to synchronize files between two computers. This information can be useful for both system administrators and home users.
Exiland Backup is a simple solution to sync files and folders
The Exiland Backup utility allows you to copy files in one direction only - from the source folder to the destination one on a schedule. It compares files in the source and destination folders, matches them, and copies new or modified files to the destination.
NOTE: You can flexibly configure the synchronization rules when creating a job. For example, if you do not want a file that was changed in the source to be overwritten in the destination, you can configure the file to be copied with a different name: either by version number or by modification date.
Download and try Exiland Backup - easy-to-use folder synchronizer.
Below we will review its application.
Step-by-step setup wizard
Let's create and configure a file sync job.
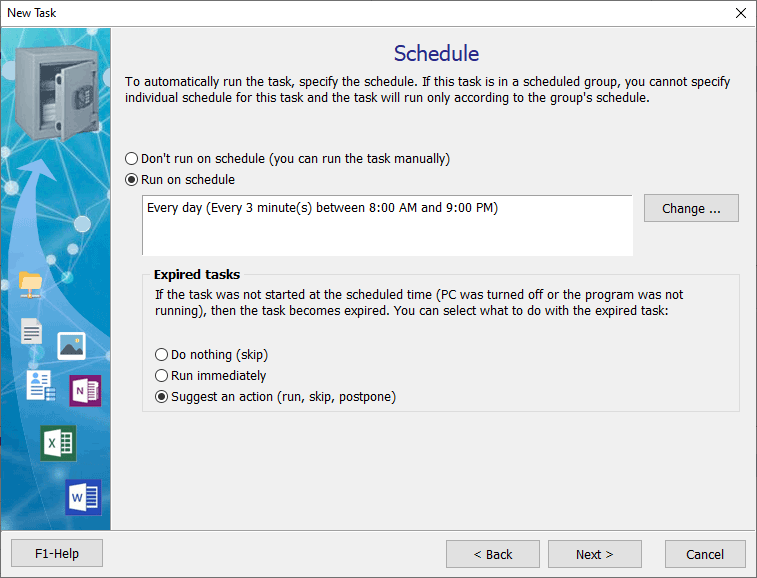
For example, we need to synchronize the "C:\Documents" folder including all subfolders from the local PC to the remote folder "\\NAS-server\Backups\Documents" every 3 minutes in the time interval 8:00 AM – 9:00 PM.
Run the program and click Create – New Job – you will see step-by-step wizard.
Step 1. Job Name
Type any name for your backup job, for example, "Backup documents" and click Next.
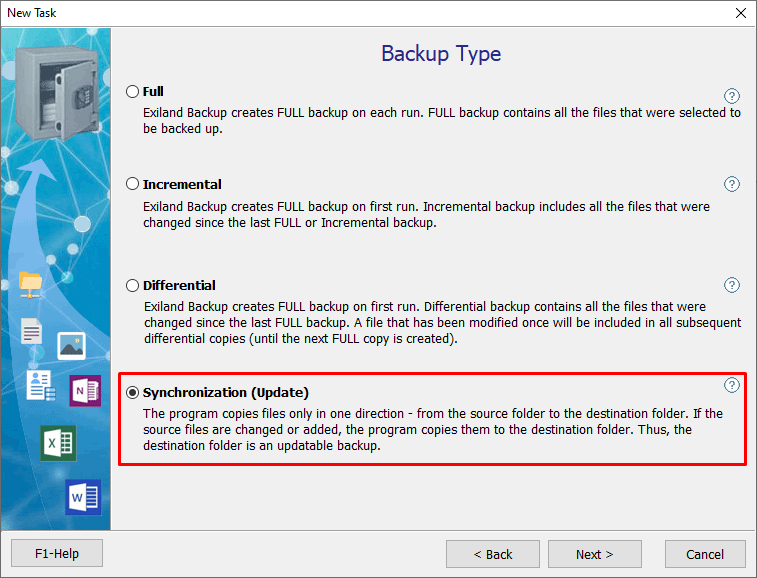
Step 2. Backup Type
Choose Synchronization (Update) and click Next.
Step 3. Source files and folders
Specify the source data you want to back up. These can be directories on a computer, flash drive, or server.
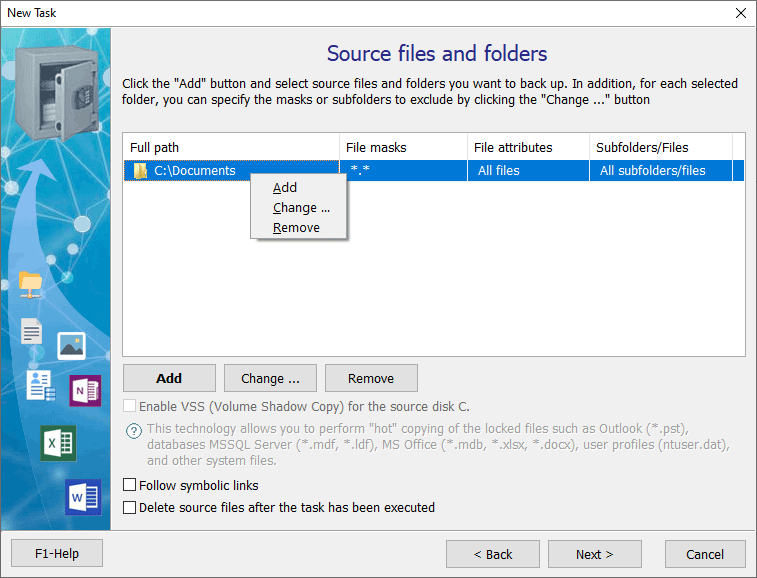
Click Add - Local/Network folders and files ..., specify the path to "C:\Documents" on your PC and click OK, after this a folder properties window will appear.
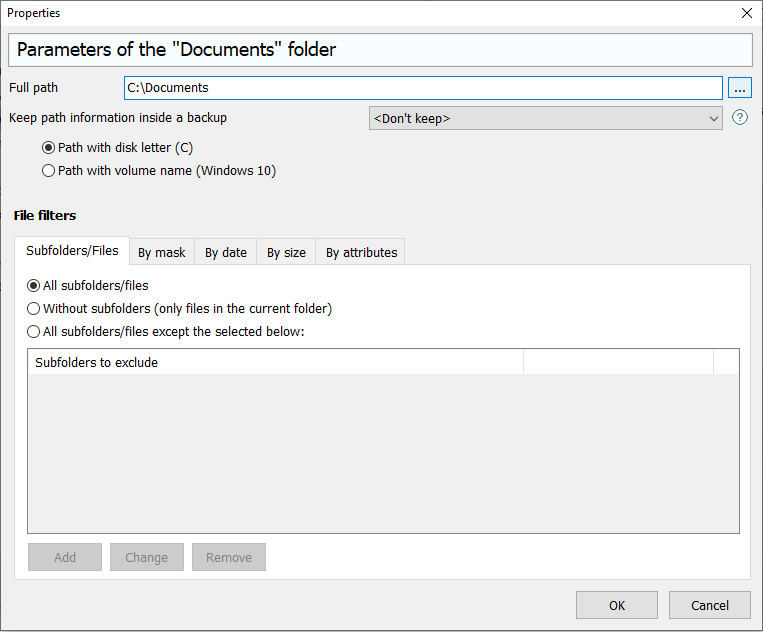
Here you can leave the default settings and click OK.
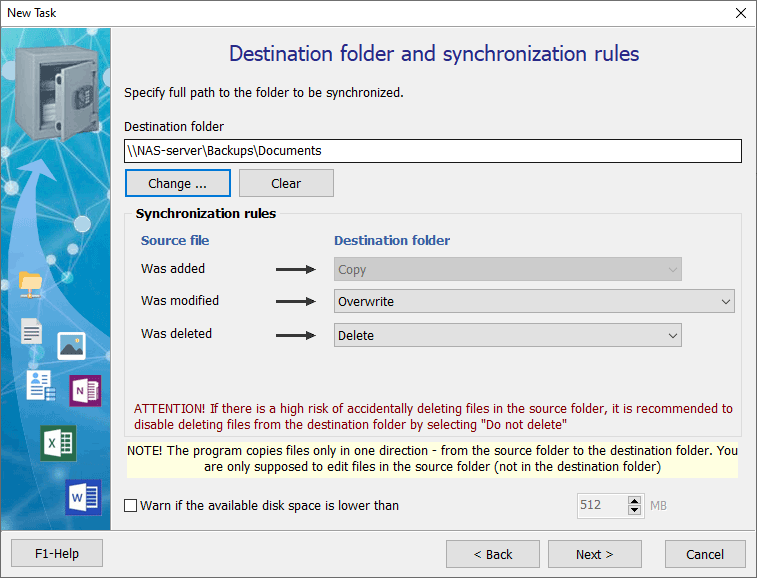
Step 4. Destination folder and synchronization rules
Specify the path to the destination directory, in our case "\\NAS-server\Backups\Documents", then specify the login/password to connect the network folder if access to it is restricted.
If you need to sync data between local folder and remote one using SFTP protocol, select SFTP when configuring the destination folder.
NOTE!. You can specify multiple folders as a source, but you can only have one destination folder!
You can also configure sync rules if needed.
Step 5. Schedule
To specify the schedule, click Change button, specify Daily schedule type, and then select the time.
Click Change... to the right of the Time field, then click Add, Periodically item and specify Every 3 minutes with an interval needed: from 8:00 AM to 9:00 PM.
Ready! Click OK several times.
Step 6. Notification
Here you can configure receiving notifications in case of errors while executing a job.
Click Finish. The job has been created!
Now you can run the job by clicking Run button on the top panel.
The program has an intuitive UI and can be used to synchronize files between Windows Server, different PCs in a local network, including between branches of an organization using FTP, SFTP (SSH) protocols.