
Automatically move files from one folder to another
In addition to its backup functions, Exiland Backup can also be used to move files from one folder to another.
Suppose you have a server (for example, MS SQL Server or another) that saves database backups locally to the "Folder1" folder, and you need the Exiland Backup program to move files from the "Folder1" to the "Folder2" via local network or send them to a remote server via FTP (SFTP), deleting files from the original "Folder1" folder.
Exiland Backup is a simple solution to move files from folder1 to folder2
Exiland Backup has a feature such as one-way synchronization of files from one folder to another. If new files appear in the original folder, they will be copied to another folder.
You will need to create and configure a job with the "Synchronize (Update)" backup type. The following describes how to do this. Below is how to do this.
Step-by-step wizard
So, let's create and configure a job for automatic file transfer.
For example, we need to move files from the "C:\Database\Backups" folder to the "\\Server-PC\Database\Backups" folder. To do this, run the program and click "Create - New Job" - a step-by-step wizard will appear.
Step 1: Job Name
Type any name for your job, such as "Move database backups", and click "Next".
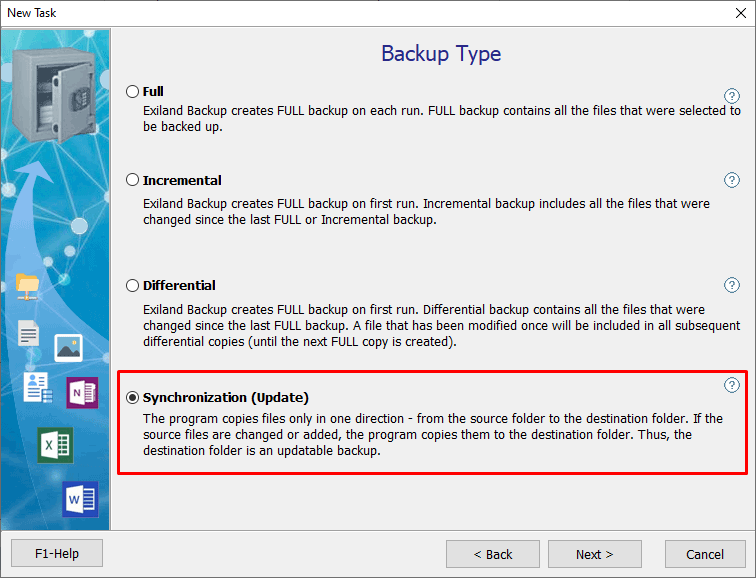
Step 2: Backup Type
Choose "Synchronization (Update)" and click "Next".
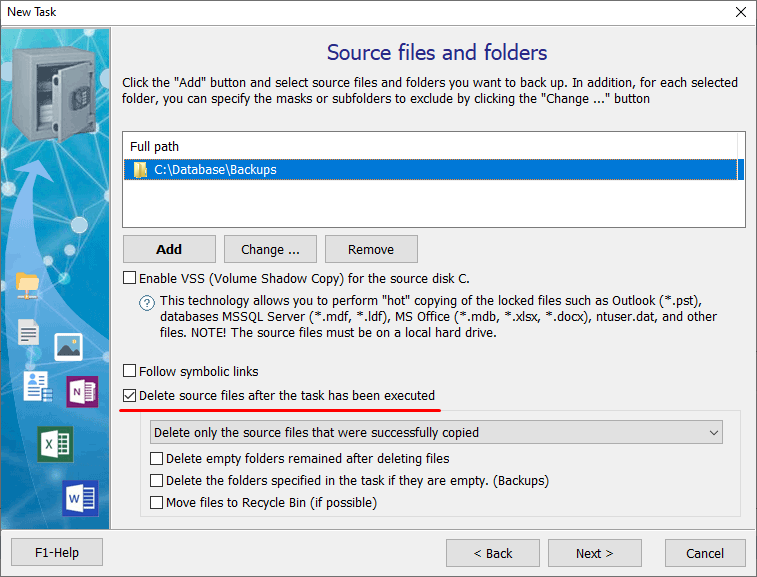
Step 3: Source files and folders
Click "Add -> Local / Network files and folders ...", specify the path to the source folder "C:\Database\Backups" and click "OK". After that, the folder settings window will appear. Here you can leave all the default properties and click "OK".
Select the "[x] Delete source files after the job has been executed" option as shown below and click "Next".
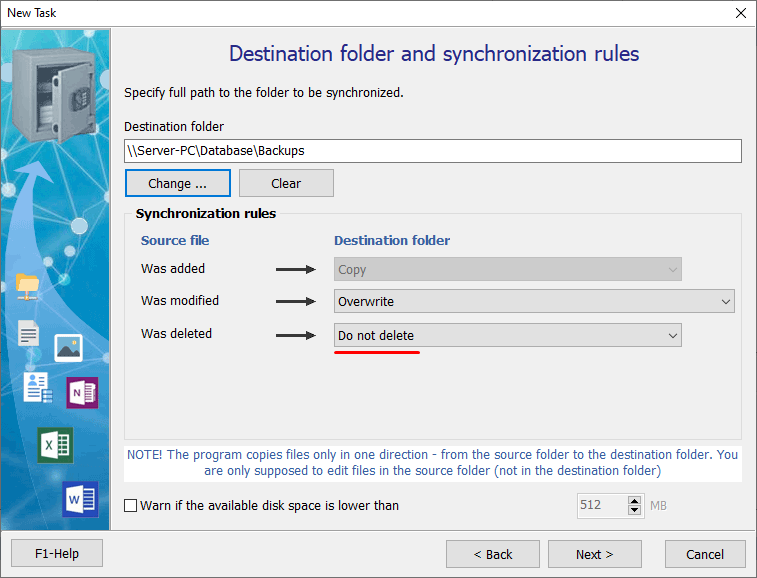
Step 4: Destination folder and synchronization rules
Specify the full path to the destination folder (in our case "\\Server-PC\Database\Backups"), and also specify the login and password to connect to the network folder, if required.
NOTE! If you need to move files from a local folder to a remote folder using FTP or SFTP protocol, select respectively FTP or SFTP when specifying the destination folder.
Also, specify "Do not delete" in the synchronization rules.
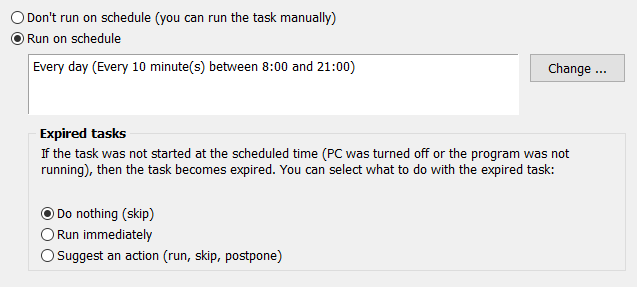
Step 5: Schedule
Select "Run on schedule", select the "Daily" type of schedule, then select the time by clicking "Change" to the right of the "Time" field, then click the "Add" button - "Periodically" and specify, for example, "Every 10 minutes" in the interval from 8:00 to 21:00. Ready. Click "OK" several times until all previously opened windows are closed.
Step 6: Notification
At this step, you can configure receiving e-mail notifications in case of errors during the job execution. Click "Finish".
Run move files
The job is already created and active. Now you can run the job by clicking on the "Run" button located on the top panel, or wait for the time to automatically run. If the source folder is empty at the start time, the program will not transfer anything - this is a normal situation.
The program has an intuitive interface and can be used to synchronize files between:
- Windows Server
- Different PCs in a local network
- between branches of an organization using FTP, SFTP (SSH) protocols
You can download the 30-day Standard or Professional demo version and test its features on your files. If the program is suitable for you, you can purchase a license (key) for Standard or Professional and become its registered user with all the benefits, such as priority technical support and updates.